

Written by Marci Brennan of Past Present Pix
If you use an iPhone, you are familiar with the Apple Live Photos option. It could be that you’ve used it and taken Live Photos that you love and have shared. Or there’s the possibility that you’ve been using it without knowing it!
As a photo organizer, I find that many of my clients are unaware they have Live Photos activated. They are also perplexed by the storage space it consumes and the types of files it creates. If this is you, read on.
How to Know if Live Photos is On
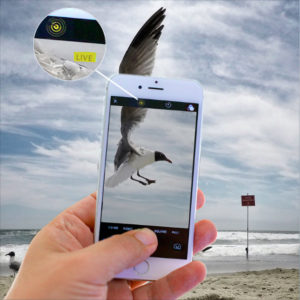
Click on your camera icon. When Live Photos is on, a yellow bullseye circle appears at the top of your screen. When it is off, the icon is white with a diagonal line through it. If you have an iPhone 6s or later this mode is on by default, so it’s up to the user to turn it off if not desired.
File Types Created by Live Photos
Shooting live photos creates many files – stills (HEIC and jpeg) and videos with audio. In your camera roll, they will only appear as a single photo. On a mobile device, the photo becomes “live” when you press and hold it. This usually captures 2-3 seconds from the time you clicked the shutter. On a desktop, the movement appears when you select the image and hover over it.
If you want to see them as video files, you’ll need to export them from Photos on your desktop computer. Select a Live Photo in Photos, then: File > Export > Export Unmodified Original. This will export two files: one still image and one video of the few seconds captured, with sound.
You can create a separate folder for these and review them to see if they are worth keeping long-term. Remember, they take up more space than still images. Keep this in mind as the year progresses and your photo collection grows. This is why it’s important to edit your photos regularly. My photo organizer mantra is “Save the best, delete the rest.” (Unless you are happy to pay for more storage space!)
Subjects to Avoid with Live Photos
Let’s say you love the offerings on a menu at a local restaurant, so you take a photo and text it to a friend. Be sure you are not taking a Live Photo. The same holds with photos taken of documents or receipts. Why is this bad?
- It’s not that interesting to have a photo that moves of a receipt.
- You’re taking up more memory than is necessary on your phone and in your iCloud.
- Static items usually do not benefit from the Live Photos app.
Another issue to remember is that burst mode and HDR files also take up a fair share of storage space. You will want to pay attention to these files as well.
What to Use the Live Photos Option for
When trying to capture a moving subject without audio, I use burst mode. But my husband enjoys the playfulness, creativity, and immediacy of Live Photos. He uses the looping and bounce effects often. Apple recently added these options.
To access, take a Live Photo. Next, click on the image and swipe up to see four options: Live (default), Loop, Bounce, and Long Exposure. I recommend trying each one out to see some fun, unexpected results.
Live Photos can also work well for capturing small snippets of sound and movement. For example – ocean waves, fireworks, birds flying and singing, and so on. Emil Pakarklis has excellent suggestions at his iPhone Photography School. This is a great place to explore the range of options that this photo mode offers.
Get creative and share your new live content with family and friends!
Recent Comments